Marketing Campaign Set Up
NetSuite users can set up a campaign to execute and track any number of advertising and marketing tactics. These tactics include a variety of channels from TV and radio ads to tradeshows & seminars, to digital & print ads, and more. One of the primary campaigns utilized by many of our clients in NetSuite is email and will be the main focus of this post.
An email campaign targets a pre-defined Group of contacts or customers which can be segmented by any number of unique characteristics. These unique features include Vertical (industry), Subscription, Customer Status (Lead/Prospect/Customer), State or Location, and many more.
Users create Groups manually or with a Saved Search. The email you send to any single recipient or group of recipients can also be created manually or you can upload an HTML file as a template. This post outlines general guidelines and best practices for conducting an email marketing campaign. For more information on creating an email marketing campaign, visit the NetSuite Help Center or click here.
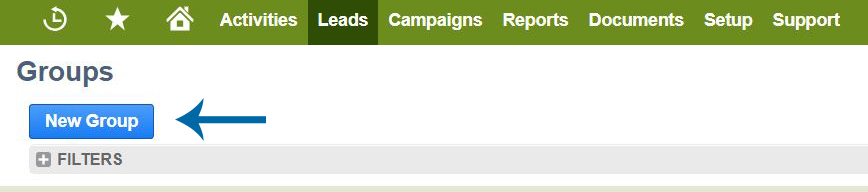
Creating a Group
Create Groups by selecting individual contacts/firms or by using a Saved Search. As with many other features in NetSuite, there are a variety of ways to navigate and begin this process. Depending on your Role, you will likely begin by navigating to either Leads > Relationships > Groups > New or Campaigns > Marketing > Groups > New. From there, you have the option of creating a Group by selecting its members or by using a Saved Search.
If you choose Static or one of the “Select …” options, you will select the Group’s members one-by-one. This is a good approach if the group only includes a few members and will be static over time.
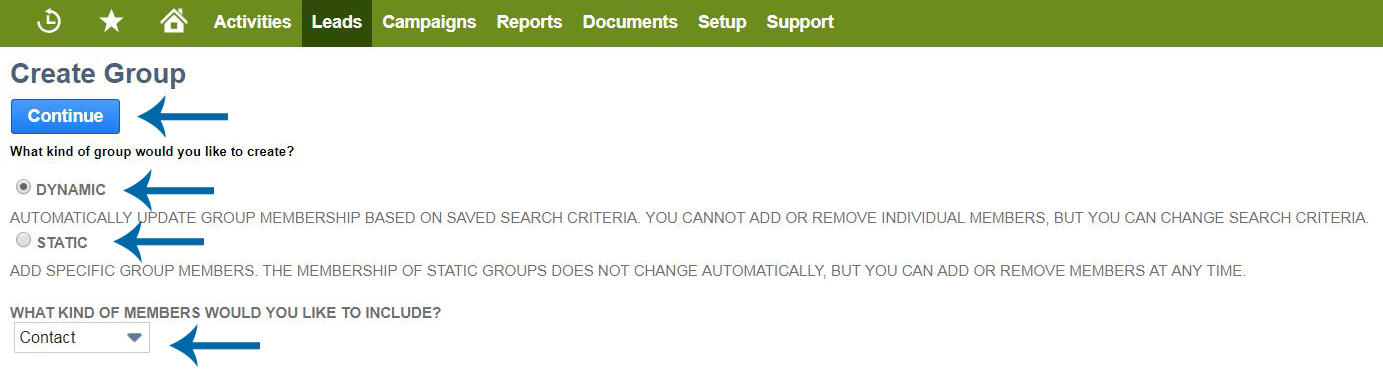
Using a Saved Search allows you to define criteria that will determine the Group’s members. Here are a few tips for creating Groups using the Search Contacts link:
- Set the Name of the Search at the top of the page so it will help recall the criteria and results.
- Set filters to determine the Group members
- You’ll generally want to conduct e-mail campaigns to a group of Contacts and use filters to define which Leads/Prospects/Customers the Contacts are associated with. Effectively, you want to create the Group of Contacts from Leads/Prospects/Customers that meet specific criteria depending on the purpose or goal of the campaign.
- Keystone frequently uses Date Created as a filter since a campaign will often target new leads/contacts added in the recent past
- Use “Customer Fields” Stage and Status to limit the group to, for example, Leads – Live, Customers, Prospects, etc.
- Set a filter for “e-mail is not empty” to ensure all people in the Group have an e-mail address.
- Select “Save & Group” when the filters are complete (this is only saving the Search, not the Group).
- Once the Search is saved, you’ll now go to a page to view and save the Group:
- Give this Group a name – you need to name the Group separately from the Search, although they can be similar.
- If you want to set an e-mail alias for this group, enter an e-mail address immediately below the Name field.
- Select the Save button to save the Group.
Now the Group can be used when conducting a campaign and will show in the Group drop-down list.

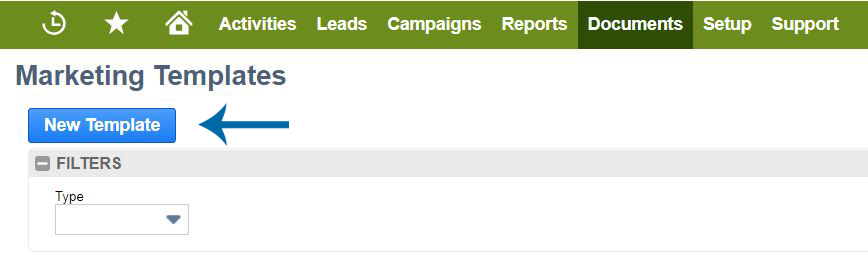
Creating an Email Template
When creating a template, we recommend using the steps outlined below. For more information on Email Templates, visit the NetSuite Help Center.
To create a Campaign E-mail Template:
- Go to Documents > Templates > Marketing Templates > New or Campaigns > Marketing > Marketing Templates
- Alternatively, you can go to this page directly from the campaign page when specifying the Marketing Template to use for a campaign.
- Select the Campaign link
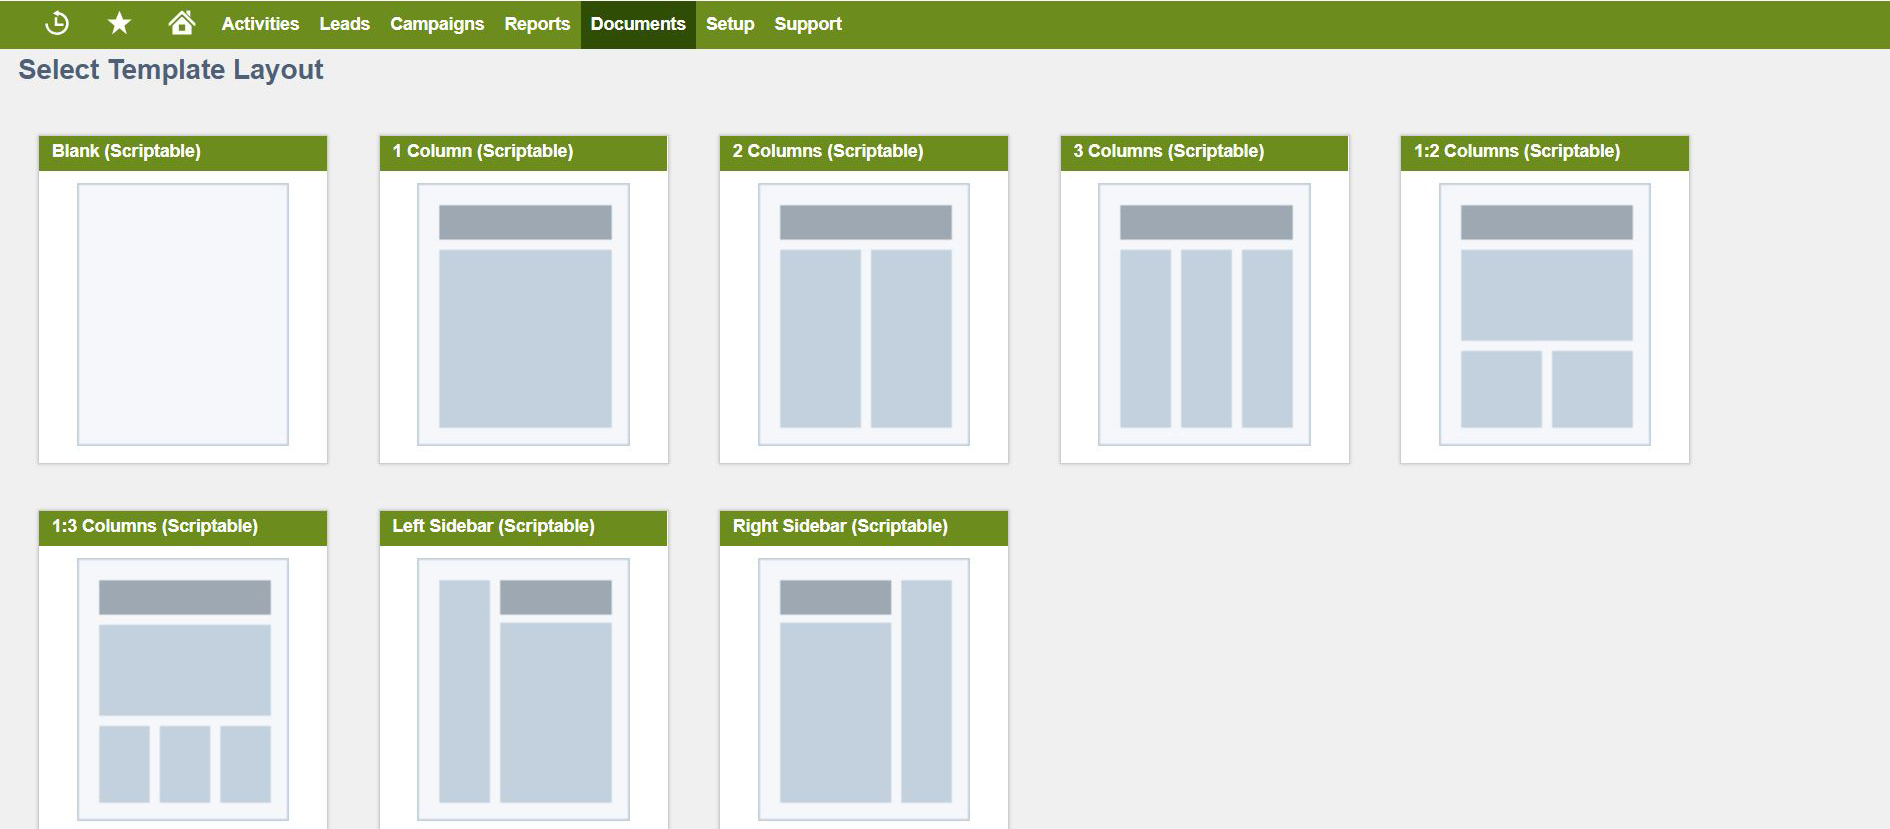
- Choose a Template Layout
- Give the template a Name that reflects the content
- Type in a Subject Line for the email in the Subject field
- Click the drop-down menu under the File radio button and upload the HTML file (if you have one prepared)
- Alternatively, click the Text Editor option
- Click Div to enable HTML text recognition and paste the source HTML code into the text box
- Or click the “View Source” box at the bottom of the page with the Text Editor option selected
- The “View Source” box is only available if the Enable Rich Text Editing box is checked on your Set Preferences > Appearances tab.
- Load any HTML graphics into your file cabinet or another web server.
- The graphics are usually loaded into the Images folder.
- The Available Offline box should be checked.
- The external URL (with https://system.netsuite.com /core …..) should be used in the document.
- You can use CRM tags in the body of the HTML file if you want to pull info from the NetSuite account into the body of the HTML e-mail.
- Go to the Restrict Access tab to make the Template Private or available to a small group of employees.

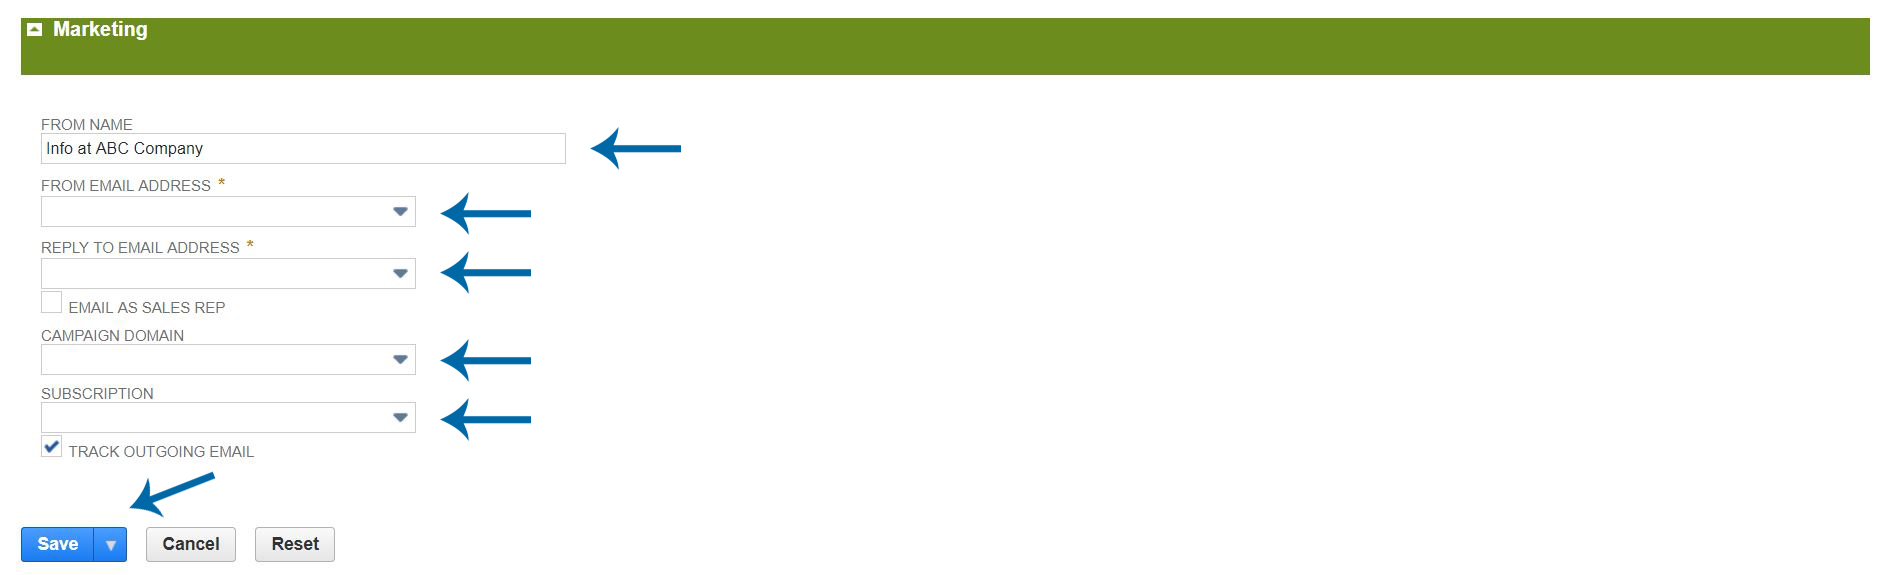
- Specify the From Name for the email address, the e-mail address used for the campaign, the email address replies will go to, the campaign domain, and other variables from the Marketing tab.
- Select Save to save the template.
Launching the Campaign
With your Group defined and Template created, you can go to the Campaign tab and set up a new campaign (or, if appropriate, add a new event to an existing campaign).
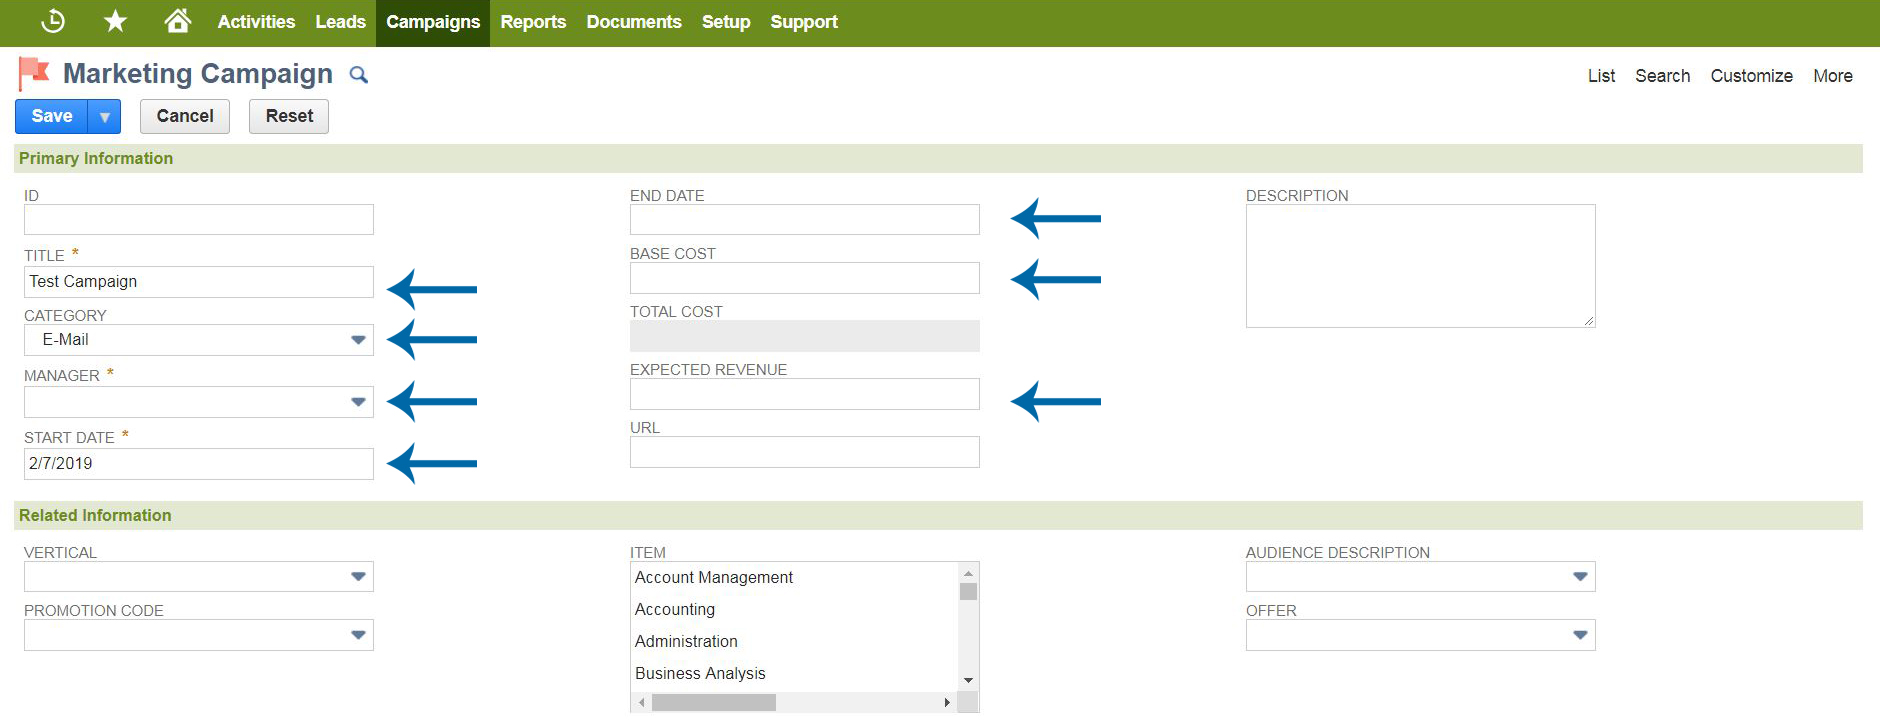
Make sure give the Campaign a title, select Email as the Category, the Start and End Dates, and include any other relevant information such as Base Cost, Expected Revenue, Vertical, and so on.
To launch an e-mail campaign, first, go to the E-Mail Campaign tab at the bottom of the Campaign page. Specify the Group in the dropdown list, the test cell (if appropriate), and the Template. Next, adjust the Title (Subject Line) here if it differs from what you had on the Email Template. Then, choose who will receive the email by selecting a Subscription. Each set of Contacts in your database will have specific Subscriptions such as Newsletter or Marketing that helps you distinguish which group of contacts you’d like to email. Only Contacts that are included in a particular Subscription you select will be sent the email.
Finally, select “Execute” in the Status column and then set the date and time you want the e-mails to be sent. The campaign will execute based on these settings.

Stay tuned for an upcoming post on how to analyze the results of your campaign once it executed or has been completed.
Much more information on Email Marketing Campaigns is available in the NetSuite Help Center.
For more information on NetSuite or how to configure a marketing campaign, contact Keystone today!
![]()
Keystone. Your NetSuite solution provider and integration partner.
Call – 866-546-7227 | Email – info@keystonebusinessservices.net


